Hi Readers,
This post is on getting started with Passport. Here I'll explain on how to create an API that will support to add users to a datasource and login and logout the user and do authenticated calls.
Here we do bit of dependency injection to make it easier to add any type of dataaccess class so that you can use your own data access class and use your own data source.
When it comes to authentication for Node and Express Passport is a famous NPM package which supports multiple strategies. Here I'll be explaining the local strategy which will use a local data source. there are other options like using facebook or google as the strategy to authenticate the user.
The sample code is shared in the below GIT repository
https://github.com/guruparan/BlogSample/tree/master/NodeAuthAPI
The script files and the usages are explained below
app.js
The main node application which is the startup file for the API, this application runs in port 5000.
authroute.js
The API for authentication which has the below POST methods
http://localhost:5000/auth/signup
creates a user, the user should be provided in the below format
{
"username":"guru",
"password":"123"
}
http://localhost:5000/auth/login
Authenticates a user, the request is same as above.
http://localhost:5000/auth/logout
A direct post to the server, will logout the user
loginstrategy.js
The strategy for validating the user, will query the database and check whether its a valid login.
passportauth.js
Setup Passport to store and retrieve the user from the session.
userdataaccess.js
Used to access the datastore to create and verify users. Here mongoose and mongo db is used to store users.
The code is commented to make it more understandable.
Just download and run the below commands to try out the sample API.
npm install
npm start
Happy Coding.
Guru
Thursday, December 28, 2017

Tuesday, November 28, 2017
EF Core 2.0 Scaffolding existing Database
Hello Readers,
This post will be on using the scaffolding mechanism to create the DB Context and model classes for the existing databases.
Whenever we start projects we come up with requirements to modify existing components, based on the requirement and the expertise we choose our paths.
Most of the time the databases are already there so we go with DB first approach to create the context.
When it comes to EF Core this option is available there as well but will include a bit of command line work.
This article will explain a way to create a DB Context from an existing database by selecting only specific tables in EF Core.
The commands are pretty straight forward you just have to install some Nuget packages and run a command to generate the context and the classes to represent the tables.
The first set of commands will be used to install the packages.
Have these things in mind
If you are creating a library (.NETStandard) to do all your data access works and a references is not added to the startup project you will get the below error. That is if you choose the .NETStandard project as the startup.
Startup project '{project name}' targets framework '.NETStandard'. There is no runtime associated with this framework, and projects targeting it cannot be executed directly. To use the Entity Framework Core Package Manager Console Tools with this project, add an executable project targeting .NET Framework or .NET Core that references this project, and set it as the startup project; or, update this project to cross-target .NET Framework or .NET Core.
If you are using a .NET Core library without adding a reference and run the scaffold command you will get the below error.
Unable to find provider assembly with name Microsoft.EntityFrameworkCore.SqlServer. Ensure the specified name is correct and is referenced by the project.
Always remember to set your class library as the startup project when running the scaffold command.This will reduce unwanted errors.
The command to scaffold is below.
Tables are a string array that you have to specify
You can use the -Force command when updating or adding tables
The verbose flag will provide you additional information and will help you when you have errors.
References
https://docs.microsoft.com/en-us/ef/core/miscellaneous/cli/powershell
Happy Coding
-Guru-
This post will be on using the scaffolding mechanism to create the DB Context and model classes for the existing databases.
Whenever we start projects we come up with requirements to modify existing components, based on the requirement and the expertise we choose our paths.
Most of the time the databases are already there so we go with DB first approach to create the context.
When it comes to EF Core this option is available there as well but will include a bit of command line work.
This article will explain a way to create a DB Context from an existing database by selecting only specific tables in EF Core.
The commands are pretty straight forward you just have to install some Nuget packages and run a command to generate the context and the classes to represent the tables.
The first set of commands will be used to install the packages.
Install-Package Microsoft.EntityFrameworkCore.Design
Install-Package Microsoft.EntityFrameworkCore.SqlServer
Install-Package Microsoft.EntityFrameworkCore.sqlserver.Design
Install-Package Microsoft.EntityFrameworkCore.Tools
Have these things in mind
If you are creating a library (.NETStandard) to do all your data access works and a references is not added to the startup project you will get the below error. That is if you choose the .NETStandard project as the startup.
Startup project '{project name}' targets framework '.NETStandard'. There is no runtime associated with this framework, and projects targeting it cannot be executed directly. To use the Entity Framework Core Package Manager Console Tools with this project, add an executable project targeting .NET Framework or .NET Core that references this project, and set it as the startup project; or, update this project to cross-target .NET Framework or .NET Core.
If you are using a .NET Core library without adding a reference and run the scaffold command you will get the below error.
Unable to find provider assembly with name Microsoft.EntityFrameworkCore.SqlServer. Ensure the specified name is correct and is referenced by the project.
Always remember to set your class library as the startup project when running the scaffold command.This will reduce unwanted errors.
The command to scaffold is below.
Scaffold-DbContext "Server=localhost;Database=DEVDB;User Id=user1;Password=test;" Microsoft.EntityFrameworkCore.SqlServer -Context DBContext -Tables "Employee","Address" -Verbose
Tables are a string array that you have to specify
You can use the -Force command when updating or adding tables
Scaffold-DbContext "Server=localhost;Database=DEVDB;User Id=user1;Password=test;" Microsoft.EntityFrameworkCore.SqlServer -Context DBContext -Tables "Employee","Address","WorkLocation" -Verbose -Force
The verbose flag will provide you additional information and will help you when you have errors.
References
https://docs.microsoft.com/en-us/ef/core/miscellaneous/cli/powershell
Happy Coding
-Guru-
Sunday, February 12, 2017
Beginner's Guide to Angular 2 + WebApi
Hello Everyone,
 There are two WebApi controllers built using the above entities one for brands and one for models.
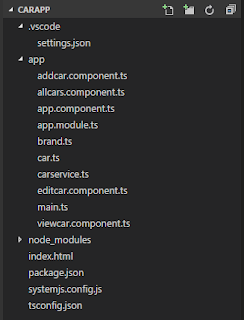
Now lets move on to the Angular 2 front end, the image below shows the file structure in VS code.
This post is an initial guide for anyone who wants to use Angular 2 to access a .Net WebApi back end to access SQL server database.
This will guide you to do the basic CRUD operations using the WebApi REST service.
Now lets see our requirement.
We have Brands and Models for cars which is having a one to many relationship where one brand will have more than one model. We will be doing the CRUD operations on the models and brands will be inserted directly to database. The image below shows the EF model of our database.

Now lets move on to the Angular 2 front end, the image below shows the file structure in VS code.
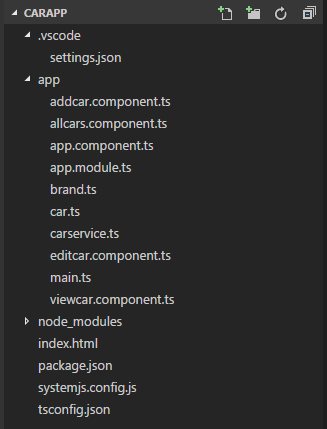
As you can see we have five component classes each will be representing an user interface except the app.component.ts which will be used as the frame for navigation and other component content will be loaded into this component as this is single page application.
We have a carservice.ts which will be interacting with the WebApi.
There are two classes Car and Brand representing our entities in the backend these will be used to when we send and receive data to the service.
The other files are the default set of files in Angular 2 project, here is brief description of each file.
Now lets move on to our user interface of listing the cars.
 You can see the code for this component class in the below URL.
https://github.com/guruparan/BlogSample/blob/master/AngularSample1/CarApp/app/allcars.component.ts
If you can see the code here we request all the cars from the carservice class and display it.
Delete option is also added to the same view where a method is called when the delete button is clicked.
The next screen will be the add new car screen

We have a carservice.ts which will be interacting with the WebApi.
There are two classes Car and Brand representing our entities in the backend these will be used to when we send and receive data to the service.
The other files are the default set of files in Angular 2 project, here is brief description of each file.
| tsconfig.json | Specifies the root files and the compiler options required to compile the project |
| systemjsconfig.js | Allows to configure SystemJS to load modules compiled using the TypeScript compiler. |
| package.json | Used by NPM installer to install the packages |
| app.module.ts | Defines AppModule, the root module that tells Angular how to assemble the application. |
Now lets move on to our user interface of listing the cars.

https://github.com/guruparan/BlogSample/blob/master/AngularSample1/CarApp/app/allcars.component.ts
If you can see the code here we request all the cars from the carservice class and display it.
Delete option is also added to the same view where a method is called when the delete button is clicked.
The next screen will be the add new car screen

Here we have a drop down of brands which will be loaded when the page loads and we will be redirecting to all cars page when the new car is saved.
You can see the code for this component in the below URL.
https://github.com/guruparan/BlogSample/blob/master/AngularSample1/CarApp/app/addcar.component.ts
The next screen will be edit item,
 As you can see the url of the browser it bring in the parameter Id of the car which will be used by to retrieve the car of that id and load the values, other than that this screen is same as the add car screen.
You can see the code for this component in the below URL.
https://github.com/guruparan/BlogSample/blob/master/AngularSample1/CarApp/app/addcar.component.ts
The next screen will be edit item,

You can see the code for this component in the below URL.
https://github.com/guruparan/BlogSample/blob/master/AngularSample1/CarApp/app/editcar.component.ts
The next screen will be view item.
 Again this screen is simple and does not have any actions, it receives the data from the service just like the edit screen using the parameter that is passed via the URL.
https://github.com/guruparan/BlogSample/blob/master/AngularSample1/CarApp/app/editcar.component.ts
The next screen will be view item.

You can see the code for this component in the below URL.
https://github.com/guruparan/BlogSample/blob/master/AngularSample1/CarApp/app/viewcar.component.ts
The most important class of all is the service class and it handles all the requests to the service.
You can see the code for the service class in the below URL.
https://github.com/guruparan/BlogSample/blob/master/AngularSample1/CarApp/app/carservice.ts
Developer Note:
1. This is not 'THE' way to do this but this is also an approach to get started.
2. The templates can be moved to separate html files but kept in the component
3. Bootstrap is used for styling , style can be added separately per component .
4. You can use any other service technology to try this out.
The whole code including the WebApi service can be obtained in the below repository.
https://github.com/guruparan/BlogSample/tree/master/AngularSample1
Happy Coding
-Guru-
https://github.com/guruparan/BlogSample/blob/master/AngularSample1/CarApp/app/viewcar.component.ts
The most important class of all is the service class and it handles all the requests to the service.
You can see the code for the service class in the below URL.
https://github.com/guruparan/BlogSample/blob/master/AngularSample1/CarApp/app/carservice.ts
Developer Note:
1. This is not 'THE' way to do this but this is also an approach to get started.
2. The templates can be moved to separate html files but kept in the component
3. Bootstrap is used for styling , style can be added separately per component .
4. You can use any other service technology to try this out.
The whole code including the WebApi service can be obtained in the below repository.
https://github.com/guruparan/BlogSample/tree/master/AngularSample1
Happy Coding
-Guru-
Friday, August 5, 2016
Powershell Script to Get SharePoint SiteUsage information
Hi Readers,
There was a requirement to get the sites that were not used , so that we can archive them.
I found some blogs with getting last modified information using the database but the issue is it wasn's correct as all the sites had a modified date which is very recent. This may be due to search crawls.
I came up with some functions that will be useful, here the last modified date and time and the people with full control access will be listed. the purpose of this script will be informing the people with full permissions.
#Get the last Modified information of a site
function GetSiteModifiedInformation
{
    #First Argument will be the site collection url
 $siteUrl=$args[0]
    #Ouput file name or path
 $filename=$args[1]

    #Check if file url is provided
 if($siteUrl -eq $null -or $siteUrl -eq '')
 {
  Write-Host "Please provide a siteUrl" -ForegroundColor Red
  return;
 }


    Write-Host "Getting Site Information" -ForegroundColor Yellow
    #Get Site using url
    $web=Get-Spweb $siteUrl

    Write-Host "Site Name : "$web.Title
    Write-Host "Created : "$web.Created
    $maxDate=GetLastModifiedListTime $web

    #Iterate subsites and get info from subsites
    foreach($spsite in $web.Webs)
    {
        $val=GetLastModifiedListTime $spsite

        if($val -gt $maxDate)
        {
            $maxDate = $val
        }
    }

    #Get all users of the site
    $userString='';
    $users = $web.siteusers
    foreach ($user in $users) {
        #Filter users with full control
        if ($web.DoesUserHavePermissions($user,[Microsoft.SharePoint.SPBasePermissions]::FullMask)) {
            $userString= $userString+$user.Name+';'
        }
    }

    Write-Host "Last Modified "$maxDate
    Write-Host $userString
    $name=$web.Title;

    #Add site information to file name
    Add-Content $filename "$siteUrl,$name,$maxDate,$userString"
    $web.Dispose()
}

function GetLastModifiedListTime
{
    #A SPWeb Object is required here
    $site= $args[0]

    #create a date variable with minimum date value
    $date = [DateTime]::MinValue

 foreach($list in $web.Lists)
 {
        #Get the most recently updated sharepoint list
  if($date -lt $list.LastItemModifiedDate -and !$list.Hidden)
  {
   $date=$list.LastItemModifiedDate
  }

 }
    return $date
}

#Another helper function that can be used to input a text file
#with sites urls
function GetAllSiteInfo
{
    $siteList =$args[0]
    $output=$args[1]
    $sites= Get-Content $siteList
    foreach($site in $sites)
    {
        GetSiteModifiedInformation $site $output
    }
}
Happy Coding
Guruparan Giritharan
Monday, May 30, 2016
ID3242: The security token could not be authenticated or authorized.
Hello Readers,
We had to setup a new content source in our search and suddenly we got this error while going to the Content sources in Search Service Application.
I googled n didn't find much information so i went through the ULS logs and found these entries.
An operation failed because the following certificate has validation errors: Subject Name: CN=###############.com Issuer Name: CN=###############.com Thumbprint: 9238C86F4CF817870AFAB778E9E5E140D7ADE82F Errors: The root of the certificate chain is not a trusted root authority..
STS Call: Failed to issue new security token. Exception: System.IdentityModel.Tokens.SecurityTokenValidationException: ID4257: X.509 certificate
'CN=###############.com' validation failed by the token handler.
An exception occurred when trying to issue security token: ID3242: The security token could not be authenticated or authorized..
the actual issue was that one of the certificates were not added to 'SPTrustedRootAuthority'
Fixing this is simple
$cert = Get-PfxCertificate C:\###############.pfx
New-SPTrustedRootAuthority -Name "###############" -Certificate $cert
If you have a certificate that requires a password
Use IE and go to 'Central Admin'/_admin/ManageTrust.aspx and upload the certifcate.
That's how i got the issue fixed.
Hope it helps :)
Happy Coding
Guruparan Giritharan
We had to setup a new content source in our search and suddenly we got this error while going to the Content sources in Search Service Application.
I googled n didn't find much information so i went through the ULS logs and found these entries.
An operation failed because the following certificate has validation errors: Subject Name: CN=###############.com Issuer Name: CN=###############.com Thumbprint: 9238C86F4CF817870AFAB778E9E5E140D7ADE82F Errors: The root of the certificate chain is not a trusted root authority..
STS Call: Failed to issue new security token. Exception: System.IdentityModel.Tokens.SecurityTokenValidationException: ID4257: X.509 certificate
'CN=###############.com' validation failed by the token handler.
An exception occurred when trying to issue security token: ID3242: The security token could not be authenticated or authorized..
the actual issue was that one of the certificates were not added to 'SPTrustedRootAuthority'
Fixing this is simple
$cert = Get-PfxCertificate C:\###############.pfx
New-SPTrustedRootAuthority -Name "###############" -Certificate $cert
If you have a certificate that requires a password
Use IE and go to 'Central Admin'/_admin/ManageTrust.aspx and upload the certifcate.
That's how i got the issue fixed.
Hope it helps :)
Happy Coding
Guruparan Giritharan
Saturday, January 9, 2016
Example on working with JSON and HttpURLConnection in Android
Hello Readers,
The new Android platforms use a class called HttpUrlConnection to work with external service calls,
This post is on a method which can send a JSON as body and receive a JSON as response you can use this method whenever you need to post a JSON to a rest location and get a json from a rest location.
This method will send the JSON string as the body of the request.
You'll have to pass the following
URL : the request url
JSON : the json to be sent can be NULL on get scenarios
Timeout : Connection timeout
Method : Http method POST / GET / PUT etc
Happy Coding
-Guru-
The new Android platforms use a class called HttpUrlConnection to work with external service calls,
This post is on a method which can send a JSON as body and receive a JSON as response you can use this method whenever you need to post a JSON to a rest location and get a json from a rest location.
This method will send the JSON string as the body of the request.
You'll have to pass the following
URL : the request url
JSON : the json to be sent can be NULL on get scenarios
Timeout : Connection timeout
Method : Http method POST / GET / PUT etc
public static String getJSON(String url, String json, int timeout, String method) {
    HttpURLConnection connection = null;
    try {

        URL u = new URL(url);
        connection = (HttpURLConnection) u.openConnection();
        connection.setRequestMethod(method);

        //set the sending type and receiving type to json
        connection.setRequestProperty("Content-Type", "application/json");
        connection.setRequestProperty("Accept", "application/json");

        connection.setAllowUserInteraction(false);
        connection.setConnectTimeout(timeout);
        connection.setReadTimeout(timeout);

        if (json != null) {
            //set the content length of the body
            connection.setRequestProperty("Content-length", json.getBytes().length + "");
            connection.setDoInput(true);
            connection.setDoOutput(true);
            connection.setUseCaches(false);

            //send the json as body of the request
            OutputStream outputStream = connection.getOutputStream();
            outputStream.write(json.getBytes("UTF-8"));
            outputStream.close();
        }

        //Connect to the server
        connection.connect();

        int status = connection.getResponseCode();
        Log.i("HTTP Client", "HTTP status code : " + status);
        switch (status) {
            case 200:
            case 201:
                BufferedReader bufferedReader = new BufferedReader(new InputStreamReader(connection.getInputStream()));
                StringBuilder sb = new StringBuilder();
                String line;
                while ((line = bufferedReader.readLine()) != null) {
                    sb.append(line + "\n");
                }
                bufferedReader.close();
                Log.i("HTTP Client", "Received String : " + sb.toString());
                //return received string
                return sb.toString();
        }

    } catch (MalformedURLException ex) {
        Log.e("HTTP Client", "Error in http connection" + ex.toString());
    } catch (IOException ex) {
        Log.e("HTTP Client", "Error in http connection" + ex.toString());
    } catch (Exception ex) {
        Log.e("HTTP Client", "Error in http connection" + ex.toString());
    } finally {
        if (connection != null) {
            try {
                connection.disconnect();
            } catch (Exception ex) {
                Log.e("HTTP Client", "Error in http connection" + ex.toString());
            }
        }
    }
    return null;
}
Happy Coding
-Guru-
Thursday, August 13, 2015
Posting JSON Object and Files to WebAPI from Javascript
This Post is on how to Post data and files in a single request from Javascript to WebAPI.
I wanted to post a Entity object along with the files but the issue i found was only one object can be posted at a time so to post data we'll have to send two AJAX calls to the service which introduces more problems such as managing transactions.
So i found out a way to overcome the issue.
Its simply posting the javascript object as a string and deserializing it from the backend.
Now lets see the code.
I wanted to post a Entity object along with the files but the issue i found was only one object can be posted at a time so to post data we'll have to send two AJAX calls to the service which introduces more problems such as managing transactions.
So i found out a way to overcome the issue.
Its simply posting the javascript object as a string and deserializing it from the backend.
Now lets see the code.
//The model class
public class Employee
{
    public int Id { get; set; }
    public string Name { get; set; }
    public string Address { get; set; }
}
//The controller
public class EmployeeController : ApiController
{
    //Post
    public IHttpActionResult Post()
    {
        var httpRequest = HttpContext.Current.Request;

        //Get Employee from posted object
        var employeeString = httpRequest.Form.Get("object");

        //Deserialize the string to object
        var employee = JsonConvert.DeserializeObject(employeeString);

        if (httpRequest.Files.Count < 1)
        {
            // return BadRequest (no file(s) available)
            return BadRequest("No files to upload");
        }

        // return result
        return Ok(employee.Name + " Inserted");
    }

}
Now the Javascript partfunction postEmployee() {
//fileToUpload is input of type file
var fileSelect = document.getElementById('fileToUpload');
var files = fileSelect.files;
var data = { Id: 1, Name: "John", Address: "US" };
var formData = new FormData();
//insert the object to be posted
//remember this is the key thats restored from the other side
formData.append("object", JSON.stringify(data));
//Append the files to be uploaded
for (var i = 0; i < files.length; i++) {
formData.append("file" + (i + 1), files[i], files[i].name);
}
var xhr = new XMLHttpRequest();
//Change the post link according to your service
xhr.open('POST', '/api/File', true);
xhr.onload = function () {
if (xhr.status === 201) {
alert(xhr.responseText);
} else {
alert(xhr.responseText);
}
};
xhr.send(formData);
}
Tuesday, April 21, 2015
Impersonating user in Sharepoint Server Object Model
Hi Readers,
I came across a requirement to upload some files using a console application to sharepoint, but there was a workflow which needed to started when an item is added, so using System Account was not an option.
This is a way to impersonate the user and access the web.
Happy Coding
Guruparan Giritharan
I came across a requirement to upload some files using a console application to sharepoint, but there was a workflow which needed to started when an item is added, so using System Account was not an option.
This is a way to impersonate the user and access the web.
//Connect to the site as System Account
using (SPSite site = new SPSite("Site URL"))
{
    using (SPWeb web = site.OpenWeb())
    {
        //Get the spuser object from the site
        SPUser userToImpersonate = web.EnsureUser(@"Domain\username");

        //Connect to the site again using the Token
        using (SPSite impSite = new SPSite("Site URL", userToImpersonate.UserToken))
        {
            using (SPWeb web2 = impSite.OpenWeb())
            {
                //Impersonated Block
            }
        }
    }
}
Happy Coding
Guruparan Giritharan
Sunday, March 29, 2015
Creating your own card based ui using JQuery
Hi Readers,
You would have come across so many card based ui's , this post is about creating your own version of it.There are so many different types of implementations, this post is about using the simple div structure and JQuery to get the task done.
So think of the creating a structure like this using html.

Its a simple structure with columns and boxes inside it. You cannot consider this as a table because the heights of the boxes may change and column count will differ when the page size changes.
I'm using fixed width for the columns so a standard width will be given for the columns.
I'm using JQuery to arrange the cards. This layouts requires all the cards to have the same css class name so it will manipulate the Div's that are having the class name.
Lets see a sample.
Here the html that we are going to transform into cards
Here you can notice that we do not have any columns. The columns will be generated by javascript.
Heres the required javascript code to create the layout.
The inline comments will explain what each method does.
(The script must be placed in a script tag)

You can add new cards using addCard() function.
Hope this is helpful and you can tryout your own card based UI.
Regards
Guru
You would have come across so many card based ui's , this post is about creating your own version of it.There are so many different types of implementations, this post is about using the simple div structure and JQuery to get the task done.
So think of the creating a structure like this using html.
Its a simple structure with columns and boxes inside it. You cannot consider this as a table because the heights of the boxes may change and column count will differ when the page size changes.
I'm using fixed width for the columns so a standard width will be given for the columns.
I'm using JQuery to arrange the cards. This layouts requires all the cards to have the same css class name so it will manipulate the Div's that are having the class name.
Lets see a sample.
Here the html that we are going to transform into cards
Here you can notice that we do not have any columns. The columns will be generated by javascript.
<!DOCTYPE html>
<html lang="en" xmlns="http://www.w3.org/1999/xhtml">
<head>
    <meta charset="utf-8" />
    <title></title>
    <style type="text/css">
        /*a simle style for the card*/
        .itemBlock {
            background-color: grey;
            margin: 5px;
            float: left;
            height: auto;
        }
    </style>
    <script type="text/javascript" src="jquery-1.8.3.min.js"></script>
</head>
<body>
    <div id="contentHolder">
        <div class="itemBlock">1 Lorem Ipsum is simply dummy text of the printing and typesetting industry. Lorem Ipsum has been the industry's standard dummy text ever since the 1500s, when an unknown printer took a galley of type and scrambled it to make a type specimen book. It has survived not only five centuries, but also the leap into electronic typesetting, remaining essentially unchanged. It was popularised in the 1960s with the release of Letraset sheets containing Lorem Ipsum passages, and more recently with desktop publishing software like Aldus PageMaker including versions of Lorem Ipsum.</div>
        <div class="itemBlock">2 Contrary to popular belief, Lorem Ipsum is not simply random text. It has roots in a piece of classical Latin literature from 45 BC, making it over 2000 years old. Richard McClintock, a Latin professor at Hampden-Sydney College in Virginia, looked up one of the more obscure Latin words, consectetur, from a Lorem Ipsum passage, and going through the cites of the word in classical literature, discovered the undoubtable source. Lorem Ipsum comes from sections 1.10.32 and 1.10.33 of "de Finibus Bonorum et Malorum" (The Extremes of Good and Evil) by Cicero, written in 45 BC. This book is a treatise on the theory of ethics, very popular during the Renaissance. The first line of Lorem Ipsum, "Lorem ipsum dolor sit amet..", comes from a line in section 1.10.32.</div>
        <div class="itemBlock">3 There are many variations of passages of Lorem Ipsum available, but the majority have suffered alteration in some form, by injected humour, or randomised words which don't look even slightly believable. If you are going to use a passage of Lorem Ipsum, you need to be sure there isn't anything embarrassing hidden in the middle of text. All the Lorem Ipsum generators on the Internet tend to repeat predefined chunks as necessary, making this the first true generator on the Internet. It uses a dictionary of over 200 Latin words, combined with a handful of model sentence structures, to generate Lorem Ipsum which looks reasonable. The generated Lorem Ipsum is therefore always free from repetition, injected humour, or non-characteristic words etc.</div>
        <div class="itemBlock">4 The standard chunk of Lorem Ipsum used since the 1500s is reproduced below for those interested. Sections 1.10.32 and 1.10.33 from "de Finibus Bonorum et Malorum" by Cicero are also reproduced in their exact original form, accompanied by English versions from the 1914 translation by H. Rackham.</div>
        <div class="itemBlock">5 Richard McClintock, a Latin professor at Hampden-Sydney College in Virginia, looked up one of the more obscure Latin words, consectetur, from a Lorem Ipsum passage, and going through the cites of the word in classical literature, discovered the undoubtable source. Lorem Ipsum comes from sections 1.10.32 and 1.10.33 of "de Finibus Bonorum et Malorum" (The Extremes of Good and Evil) by Cicero, written in 45 BC. This book is a treatise on the theory of ethics, very popular during the Renaissance. The first line of Lorem Ipsum, "Lorem ipsum dolor sit amet..", comes from a line in section 1.10.32.</div>
        <div class="itemBlock">6 Lorem Ipsum is simply dummy text of the printing and typesetting industry. Lorem Ipsum has been the industry's standard dummy text ever since the 1500s, when an unknown printer took a galley of type and scrambled it to make a type specimen book. It has survived not only five centuries, but also the leap into electronic typesetting, remaining essentially unchanged. It was popularised in the 1960s with the release of Letraset sheets containing Lorem Ipsum passages, and more recently with desktop publishing software like Aldus PageMaker including versions of Lorem Ipsum.</div>
        <div class="itemBlock">7 Contrary to popular belief, Lorem Ipsum is not simply random text. It has roots in a piece of classical Latin literature from 45 BC, making it over 2000 years old. Richard McClintock, a Latin professor at Hampden-Sydney College in Virginia, looked up one of the more obscure Latin words, consectetur, from a Lorem Ipsum passage, and going through the cites of the word in classical literature, discovered the undoubtable source. Lorem Ipsum comes from sections 1.10.32 and 1.10.33 of "de Finibus Bonorum et Malorum" (The Extremes of Good and Evil) by Cicero, written in 45 BC. This book is a treatise on the theory of ethics, very popular during the Renaissance. The first line of Lorem Ipsum, "Lorem ipsum dolor sit amet..", comes from a line in section 1.10.32.</div>
        <div class="itemBlock">8 There are many variations of passages of Lorem Ipsum available, but the majority have suffered alteration in some form, by injected humour, or randomised words which don't look even slightly believable. If you are going to use a passage of Lorem Ipsum, you need to be sure there isn't anything embarrassing hidden in the middle of text. All the Lorem Ipsum generators on the Internet tend to repeat predefined chunks as necessary, making this the first true generator on the Internet. It uses a dictionary of over 200 Latin words, combined with a handful of model sentence structures, to generate Lorem Ipsum which looks reasonable. The generated Lorem Ipsum is therefore always free from repetition, injected humour, or non-characteristic words etc.</div>
        <div class="itemBlock">9 The standard chunk of Lorem Ipsum used since the 1500s is reproduced below for those interested. Sections 1.10.32 and 1.10.33 from "de Finibus Bonorum et Malorum" by Cicero are also reproduced in their exact original form, accompanied by English versions from the 1914 translation by H. Rackham.</div>
        <div class="itemBlock">10 Richard McClintock, a Latin professor at Hampden-Sydney College in Virginia, looked up one of the more obscure Latin words, consectetur, from a Lorem Ipsum passage, and going through the cites of the word in classical literature, discovered the undoubtable source. Lorem Ipsum comes from sections 1.10.32 and 1.10.33 of "de Finibus Bonorum et Malorum" (The Extremes of Good and Evil) by Cicero, written in 45 BC. This book is a treatise on the theory of ethics, very popular during the Renaissance. The first line of Lorem Ipsum, "Lorem ipsum dolor sit amet..", comes from a line in section 1.10.32.</div>
        <div class="itemBlock">11 Lorem Ipsum is simply dummy text of the printing and typesetting industry. Lorem Ipsum has been the industry's standard dummy text ever since the 1500s, when an unknown printer took a galley of type and scrambled it to make a type specimen book. It has survived not only five centuries, but also the leap into electronic typesetting, remaining essentially unchanged. It was popularised in the 1960s with the release of Letraset sheets containing Lorem Ipsum passages, and more recently with desktop publishing software like Aldus PageMaker including versions of Lorem Ipsum.</div>
        <div class="itemBlock">12 Contrary to popular belief, Lorem Ipsum is not simply random text. It has roots in a piece of classical Latin literature from 45 BC, making it over 2000 years old. Richard McClintock, a Latin professor at Hampden-Sydney College in Virginia, looked up one of the more obscure Latin words, consectetur, from a Lorem Ipsum passage, and going through the cites of the word in classical literature, discovered the undoubtable source. Lorem Ipsum comes from sections 1.10.32 and 1.10.33 of "de Finibus Bonorum et Malorum" (The Extremes of Good and Evil) by Cicero, written in 45 BC. This book is a treatise on the theory of ethics, very popular during the Renaissance. The first line of Lorem Ipsum, "Lorem ipsum dolor sit amet..", comes from a line in section 1.10.32.</div>
        <div class="itemBlock">13 There are many variations of passages of Lorem Ipsum available, but the majority have suffered alteration in some form, by injected humour, or randomised words which don't look even slightly believable. If you are going to use a passage of Lorem Ipsum, you need to be sure there isn't anything embarrassing hidden in the middle of text. All the Lorem Ipsum generators on the Internet tend to repeat predefined chunks as necessary, making this the first true generator on the Internet. It uses a dictionary of over 200 Latin words, combined with a handful of model sentence structures, to generate Lorem Ipsum which looks reasonable. The generated Lorem Ipsum is therefore always free from repetition, injected humour, or non-characteristic words etc.</div>
        <div class="itemBlock">14 The standard chunk of Lorem Ipsum used since the 1500s is reproduced below for those interested. Sections 1.10.32 and 1.10.33 from "de Finibus Bonorum et Malorum" by Cicero are also reproduced in their exact original form, accompanied by English versions from the 1914 translation by H. Rackham.</div>
        <div class="itemBlock">15 Richard McClintock, a Latin professor at Hampden-Sydney College in Virginia, looked up one of the more obscure Latin words, consectetur, from a Lorem Ipsum passage, and going through the cites of the word in classical literature, discovered the undoubtable source. Lorem Ipsum comes from sections 1.10.32 and 1.10.33 of "de Finibus Bonorum et Malorum" (The Extremes of Good and Evil) by Cicero, written in 45 BC. This book is a treatise on the theory of ethics, very popular during the Renaissance. The first line of Lorem Ipsum, "Lorem ipsum dolor sit amet..", comes from a line in section 1.10.32.</div>
        <div class="itemBlock">16 Lorem Ipsum is simply dummy text of the printing and typesetting industry. Lorem Ipsum has been the industry's standard dummy text ever since the 1500s, when an unknown printer took a galley of type and scrambled it to make a type specimen book. It has survived not only five centuries, but also the leap into electronic typesetting, remaining essentially unchanged. It was popularised in the 1960s with the release of Letraset sheets containing Lorem Ipsum passages, and more recently with desktop publishing software like Aldus PageMaker including versions of Lorem Ipsum.</div>
        <div class="itemBlock">17 Contrary to popular belief, Lorem Ipsum is not simply random text. It has roots in a piece of classical Latin literature from 45 BC, making it over 2000 years old. Richard McClintock, a Latin professor at Hampden-Sydney College in Virginia, looked up one of the more obscure Latin words, consectetur, from a Lorem Ipsum passage, and going through the cites of the word in classical literature, discovered the undoubtable source. Lorem Ipsum comes from sections 1.10.32 and 1.10.33 of "de Finibus Bonorum et Malorum" (The Extremes of Good and Evil) by Cicero, written in 45 BC. This book is a treatise on the theory of ethics, very popular during the Renaissance. The first line of Lorem Ipsum, "Lorem ipsum dolor sit amet..", comes from a line in section 1.10.32.</div>
        <div class="itemBlock">18 There are many variations of passages of Lorem Ipsum available, but the majority have suffered alteration in some form, by injected humour, or randomised words which don't look even slightly believable. If you are going to use a passage of Lorem Ipsum, you need to be sure there isn't anything embarrassing hidden in the middle of text. All the Lorem Ipsum generators on the Internet tend to repeat predefined chunks as necessary, making this the first true generator on the Internet. It uses a dictionary of over 200 Latin words, combined with a handful of model sentence structures, to generate Lorem Ipsum which looks reasonable. The generated Lorem Ipsum is therefore always free from repetition, injected humour, or non-characteristic words etc.</div>
        <div class="itemBlock">19 The standard chunk of Lorem Ipsum used since the 1500s is reproduced below for those interested. Sections 1.10.32 and 1.10.33 from "de Finibus Bonorum et Malorum" by Cicero are also reproduced in their exact original form, accompanied by English versions from the 1914 translation by H. Rackham.</div>
        <div class="itemBlock">20 Richard McClintock, a Latin professor at Hampden-Sydney College in Virginia, looked up one of the more obscure Latin words, consectetur, from a Lorem Ipsum passage, and going through the cites of the word in classical literature, discovered the undoubtable source. Lorem Ipsum comes from sections 1.10.32 and 1.10.33 of "de Finibus Bonorum et Malorum" (The Extremes of Good and Evil) by Cicero, written in 45 BC. This book is a treatise on the theory of ethics, very popular during the Renaissance. The first line of Lorem Ipsum, "Lorem ipsum dolor sit amet..", comes from a line in section 1.10.32.</div>
        <div class="itemBlock">21 Lorem Ipsum is simply dummy text of the printing and typesetting industry. Lorem Ipsum has been the industry's standard dummy text ever since the 1500s, when an unknown printer took a galley of type and scrambled it to make a type specimen book. It has survived not only five centuries, but also the leap into electronic typesetting, remaining essentially unchanged. It was popularised in the 1960s with the release of Letraset sheets containing Lorem Ipsum passages, and more recently with desktop publishing software like Aldus PageMaker including versions of Lorem Ipsum.</div>
        <div class="itemBlock">22 Contrary to popular belief, Lorem Ipsum is not simply random text. It has roots in a piece of classical Latin literature from 45 BC, making it over 2000 years old. Richard McClintock, a Latin professor at Hampden-Sydney College in Virginia, looked up one of the more obscure Latin words, consectetur, from a Lorem Ipsum passage, and going through the cites of the word in classical literature, discovered the undoubtable source. Lorem Ipsum comes from sections 1.10.32 and 1.10.33 of "de Finibus Bonorum et Malorum" (The Extremes of Good and Evil) by Cicero, written in 45 BC. This book is a treatise on the theory of ethics, very popular during the Renaissance. The first line of Lorem Ipsum, "Lorem ipsum dolor sit amet..", comes from a line in section 1.10.32.</div>
        <div class="itemBlock">23 There are many variations of passages of Lorem Ipsum available, but the majority have suffered alteration in some form, by injected humour, or randomised words which don't look even slightly believable. If you are going to use a passage of Lorem Ipsum, you need to be sure there isn't anything embarrassing hidden in the middle of text. All the Lorem Ipsum generators on the Internet tend to repeat predefined chunks as necessary, making this the first true generator on the Internet. It uses a dictionary of over 200 Latin words, combined with a handful of model sentence structures, to generate Lorem Ipsum which looks reasonable. The generated Lorem Ipsum is therefore always free from repetition, injected humour, or non-characteristic words etc.</div>
        <div class="itemBlock">24 The standard chunk of Lorem Ipsum used since the 1500s is reproduced below for those interested. Sections 1.10.32 and 1.10.33 from "de Finibus Bonorum et Malorum" by Cicero are also reproduced in their exact original form, accompanied by English versions from the 1914 translation by H. Rackham.</div>
        <div class="itemBlock">25 Richard McClintock, a Latin professor at Hampden-Sydney College in Virginia, looked up one of the more obscure Latin words, consectetur, from a Lorem Ipsum passage, and going through the cites of the word in classical literature, discovered the undoubtable source. Lorem Ipsum comes from sections 1.10.32 and 1.10.33 of "de Finibus Bonorum et Malorum" (The Extremes of Good and Evil) by Cicero, written in 45 BC. This book is a treatise on the theory of ethics, very popular during the Renaissance. The first line of Lorem Ipsum, "Lorem ipsum dolor sit amet..", comes from a line in section 1.10.32.</div>
        <div class="itemBlock">26 Lorem Ipsum is simply dummy text of the printing and typesetting industry. Lorem Ipsum has been the industry's standard dummy text ever since the 1500s, when an unknown printer took a galley of type and scrambled it to make a type specimen book. It has survived not only five centuries, but also the leap into electronic typesetting, remaining essentially unchanged. It was popularised in the 1960s with the release of Letraset sheets containing Lorem Ipsum passages, and more recently with desktop publishing software like Aldus PageMaker including versions of Lorem Ipsum.</div>
        <div class="itemBlock">27 Contrary to popular belief, Lorem Ipsum is not simply random text. It has roots in a piece of classical Latin literature from 45 BC, making it over 2000 years old. Richard McClintock, a Latin professor at Hampden-Sydney College in Virginia, looked up one of the more obscure Latin words, consectetur, from a Lorem Ipsum passage, and going through the cites of the word in classical literature, discovered the undoubtable source. Lorem Ipsum comes from sections 1.10.32 and 1.10.33 of "de Finibus Bonorum et Malorum" (The Extremes of Good and Evil) by Cicero, written in 45 BC. This book is a treatise on the theory of ethics, very popular during the Renaissance. The first line of Lorem Ipsum, "Lorem ipsum dolor sit amet..", comes from a line in section 1.10.32.</div>
        <div class="itemBlock">28 There are many variations of passages of Lorem Ipsum available, but the majority have suffered alteration in some form, by injected humour, or randomised words which don't look even slightly believable. If you are going to use a passage of Lorem Ipsum, you need to be sure there isn't anything embarrassing hidden in the middle of text. All the Lorem Ipsum generators on the Internet tend to repeat predefined chunks as necessary, making this the first true generator on the Internet. It uses a dictionary of over 200 Latin words, combined with a handful of model sentence structures, to generate Lorem Ipsum which looks reasonable. The generated Lorem Ipsum is therefore always free from repetition, injected humour, or non-characteristic words etc.</div>
        <div class="itemBlock">29 The standard chunk of Lorem Ipsum used since the 1500s is reproduced below for those interested. Sections 1.10.32 and 1.10.33 from "de Finibus Bonorum et Malorum" by Cicero are also reproduced in their exact original form, accompanied by English versions from the 1914 translation by H. Rackham.</div>
        <div class="itemBlock">30 Richard McClintock, a Latin professor at Hampden-Sydney College in Virginia, looked up one of the more obscure Latin words, consectetur, from a Lorem Ipsum passage, and going through the cites of the word in classical literature, discovered the undoubtable source. Lorem Ipsum comes from sections 1.10.32 and 1.10.33 of "de Finibus Bonorum et Malorum" (The Extremes of Good and Evil) by Cicero, written in 45 BC. This book is a treatise on the theory of ethics, very popular during the Renaissance. The first line of Lorem Ipsum, "Lorem ipsum dolor sit amet..", comes from a line in section 1.10.32.</div>
    </div>
</body>
</html>
Heres the required javascript code to create the layout.
The inline comments will explain what each method does.
(The script must be placed in a script tag)
//Width of the column
var columnWidth = 200;

//Number of columns
//Will change when page width is adjusted
var columnCount = 0;

//Main div that holds the cards
var containerName = "#contentHolder";

//Css class to identify the card
var cardClass = "itemBlock";

//Attribute to maintain the card order
var cardAttribute = "data-viewId";

//Filter to filter the card
var filter = "div." + cardClass;


$(document).ready(function () {

    //Get the number of columns
    columnCount = getColumnCount();

    //Reset the layout when the window is resized
    $(window).resize(function () {
        var columns = getColumnCount();
        if (columnCount != columns) {
            columnCount = columns;
            reset();
        }
    });

    $.each($(containerName).children(), function (val) {
        $(this).attr(cardAttribute, val + 1);
    });

    for (var i = 0; i < columnCount; i++) {
        $(containerName).append("

");
    }

    initialize();
});

//Calculate column count based on the width
function getColumnCount() {
    var columnCount = $(containerName).width() / (columnWidth + 10);
    return Math.floor(columnCount);
}

//Reset the layout when the page is resized
function reset() {
    var count = $(filter).length;
    for (var i = 0; i < length; i++) {
        $(filter + "[" + cardAttribute + "=" + (i + 1) + "]").appendTo($(containerName));
    }
    initialize();
}


//initialize the card layout
function initialize() {

    //Get the number of cards in the html
    var count = $(filter).length;
    var firstRun = true;

    //Append the required column divs
    for (var i = 0; i < columnCount; i++) {
        if ($("#col" + (i + 1)).length == 0) {
            $(containerName).append("

");
        }
    }

    //Move the cards to the columns to the layout
    for (var i = 0; i < count; i++) {
        var col = (i + 1) % columnCount;

        if (col == 0) {
            col = columnCount;
        }

        if (firstRun) {
            $(filter + "[" + cardAttribute + "=" + (i + 1) + "]").appendTo($("#col" + col));
        }
        else {
            $(filter + "[" + cardAttribute + "=" + (i + 1) + "]").appendTo($("#" + getDivToAdd()));
        }

        if (col == columnCount && firstRun) {
            firstRun = false;
        }
    }
}

//Get the column that a given div is added
function getDivToAdd() {
    var div = "col1";
    for (var i = columnCount; i > 0; i--) {
        if ($("#col" + i).height() <= $("#" + div).height()) {
            div = $("#col" + i).attr("id");
        }
    }
    return div;
}

//Add a new card to layout
function addCard(itemHtml) {
    var itemId = $(filter).length + 1;
    var item = $(itemHtml);
    item.attr(cardAttribute, itemId);
    item.appendTo($("#" + getDivToAdd()));
}
This is the sample output of the code. You can add new cards using addCard() function.
Hope this is helpful and you can tryout your own card based UI.
Regards
Guru
Monday, October 6, 2014
Deploying Lists and Adding new lists via features
Hi Readers,
This post will give you information on deploying lists , making changes to the lists and adding new lists to the Sharepoint site in O365 or on premise.
What we are using here is feature upgrades, its simple and fast also Sharepoint manages most of the work.
Lets go step by step
First create a project and add a list

Add a new column and name it description

Now from the solution explorer open "Feature1" this will be the feature which we'll be using to deploy and update our lists

Now press F4 or open the properties pane and give a version to the feature, as its the first deployment I've put version 1.0.0.0

Now package the WSP and upload it the the solution gallery, you can get to solution gallery by going to "Site settings -> Solutions" , and activate the solution.


Now our list will be created.

As we have deployed the list, lets see how we can upgrade it, for this I'm going to add a new column to the list,that is called SubTitle

Now open the feature1 again and give it a new version number "2.0.0.0"

Providing a new version number will not update it, we'll have to edit the feature's manifest to do this,
First open feature1 and move to the manifest tab.
 At the bottom you'll see a link saying "Overwrite generated xml file", now you'll see the screen below click the "Edit manifest in the xml editor"


Now we'll have to edit the manifest and add upgrade actions to it, here we are asking sharepoint to apply the element manifest if the version is greater than 2.0.0.0.

Now package the WSP.
Here we'll have to do another step before deploying , that is rename the file, then only sharepoint will ask to upgrade it.

Upload the new file and it'll ask you to upgrade the solution. click upgrade.
 Now you can see that the newer version is activated.

If you go to your list it'll be updated and the new column will be there.


Now you'll see that a new feature is added to your solution, you may delete it, because its not required.

Open the feature again but this time we'll need to go the edit manifest screen and copy the upgrade actions we did in the last part,
Keep it safe in a notepad.

And click the "Discard manifest edits..." and now you can add the new library to the feature using the UI.

Again go to manifest tab and go to XML editor , here we'll have to update the version number and add new upgrade actions, you can see the edits that are done to the xml file. Also the version is increased as well.

You may create the wsp and upgrade the solution but the list will not be created.

If you increase the version again and deploy n upgrade the solution , the list will be created.

You can see that the latest version is activated.

And now your library is created.
 You can use this technique to update lists and add new lists, any site that is having this feature will be upgraded and the new lists will be created.
Happy Coding
-Guruparan Giritharan-
This post will give you information on deploying lists , making changes to the lists and adding new lists to the Sharepoint site in O365 or on premise.
What we are using here is feature upgrades, its simple and fast also Sharepoint manages most of the work.
Lets go step by step
First create a project and add a list
Add a new column and name it description
Now from the solution explorer open "Feature1" this will be the feature which we'll be using to deploy and update our lists
Now package the WSP and upload it the the solution gallery, you can get to solution gallery by going to "Site settings -> Solutions" , and activate the solution.
Now go to site features from site settings and you can view the feature that we have deployed, activate it.
Now our list will be created.
As we have deployed the list, lets see how we can upgrade it, for this I'm going to add a new column to the list,that is called SubTitle
Now open the feature1 again and give it a new version number "2.0.0.0"
Providing a new version number will not update it, we'll have to edit the feature's manifest to do this,
First open feature1 and move to the manifest tab.
Click that and you'll see the manifest of the feature, the manifest will look like this
Now we'll have to edit the manifest and add upgrade actions to it, here we are asking sharepoint to apply the element manifest if the version is greater than 2.0.0.0.
Now package the WSP.
Here we'll have to do another step before deploying , that is rename the file, then only sharepoint will ask to upgrade it.
Upload the new file and it'll ask you to upgrade the solution. click upgrade.
If you go to your list it'll be updated and the new column will be there.
Now we'll see how to add a new library to our feature.
Add a new list and select the type as library
Now you'll see that a new feature is added to your solution, you may delete it, because its not required.
Open the feature again but this time we'll need to go the edit manifest screen and copy the upgrade actions we did in the last part,
Keep it safe in a notepad.
And click the "Discard manifest edits..." and now you can add the new library to the feature using the UI.
Again go to manifest tab and go to XML editor , here we'll have to update the version number and add new upgrade actions, you can see the edits that are done to the xml file. Also the version is increased as well.
You may create the wsp and upgrade the solution but the list will not be created.
If you increase the version again and deploy n upgrade the solution , the list will be created.
You can see that the latest version is activated.
And now your library is created.
Happy Coding
-Guruparan Giritharan-
Monday, June 2, 2014
Upgradable Sharepoint Webtemplates - Introduction
Hi Readers,
This post is about creating web templates that are upgradable, the method I'm using here is using several features to upgrade the site template.
Let's see the requirement for this, think that your client has a requirement for creating a team site which has a template that is different from the out of the box team site, this may include the contents of the site or even the structure of the site. Your client may ask for a set of lists and libraries that are to be created when a new site is created and the site may have pages that are to be created and webparts are to be placed at those pages.
It may sound simple and you may think that creating a simple site and saving the web template will do the trick, well at some times it will but what if your client comes up with a new library to be added to all the site that are created ?.
Of course you can create a new template after adding the new library, then what happens to all the sites that are already created ?, you may go to each and every site and create the library, what if there are hundreds of sites created ? , will it be practical to go to each site and add the library the answer is No because nobody is ready to do a task like this, You may of course use powershell script or a simple console application to do this but even that may not be possible in production environments.
So lets go to the solution, that is creating a web template and using several features to deploy the content and structure by doing this you can simply update the sites that are created and the site are to be created in the future.
This blog post series will have three more posts
1. Updating lists, adding lists
2. Updating webparts
3. Updating Webpart pages
The concept behind this is Feature Updating and all this is done using sandboxed solutions because it will work in Sharepoint Online as well.
I'm going to create 3 different features and show how to update them, when you create the site you can simply activate them and create a template from it and by upgrading the features you can simply update the sites.
Only problem you may face here is activating a new feature to existing sites, that of course will have to be done using the powershell.
Hope you find this post useful.
-Guruparan-
This post is about creating web templates that are upgradable, the method I'm using here is using several features to upgrade the site template.
Let's see the requirement for this, think that your client has a requirement for creating a team site which has a template that is different from the out of the box team site, this may include the contents of the site or even the structure of the site. Your client may ask for a set of lists and libraries that are to be created when a new site is created and the site may have pages that are to be created and webparts are to be placed at those pages.
It may sound simple and you may think that creating a simple site and saving the web template will do the trick, well at some times it will but what if your client comes up with a new library to be added to all the site that are created ?.
Of course you can create a new template after adding the new library, then what happens to all the sites that are already created ?, you may go to each and every site and create the library, what if there are hundreds of sites created ? , will it be practical to go to each site and add the library the answer is No because nobody is ready to do a task like this, You may of course use powershell script or a simple console application to do this but even that may not be possible in production environments.
So lets go to the solution, that is creating a web template and using several features to deploy the content and structure by doing this you can simply update the sites that are created and the site are to be created in the future.
This blog post series will have three more posts
1. Updating lists, adding lists
2. Updating webparts
3. Updating Webpart pages
The concept behind this is Feature Updating and all this is done using sandboxed solutions because it will work in Sharepoint Online as well.
I'm going to create 3 different features and show how to update them, when you create the site you can simply activate them and create a template from it and by upgrading the features you can simply update the sites.
Only problem you may face here is activating a new feature to existing sites, that of course will have to be done using the powershell.
Hope you find this post useful.
-Guruparan-
Sunday, May 11, 2014
Creating a JQuery Plugin
Hi Readers
Now lets see the coding, all explanations are given as comments.
Now lets see the html section
So thats how you create a simple Jquery plugin.
Happy Coding :)
-Guru-
This post is about creating a plugin using JQuery.
You may have used many plugins that are developed using jquery and wondered how they are developed,
I expect you to know the basics of jqurey to understand this post but will make it as simple as possible.
This post will explain how to create a simple textbox which is a readonly textbox and getting and setting the value will be done via the methods that we create, there is a method to reset the value as well.
Now lets see the coding, all explanations are given as comments.
// Option gets the option settings or the function name
// value is to get the value for setters
$.fn.CustomTextBox = function (option, value) {

    // If options are passed then initialize the textbox
    if (typeof (option) == 'object') {
        //Append the textbox
        //its recommended that you put a class name so that its easy for styling
        $(this).append("<input readonly="" type="text" value="" + option.Text + "" />");
        //Store the default value in the data so that it can be accessed later
        //This method can be used to store the server urls and other setting which needed
        //to be accessed later
        $(this).data("Default", option.Text);
    }
    // If a string is passed its assumed that it a method call
    else {
        //Switch the method based on the string passed
        switch (option) {

            case "Set":
                //If its set then set the value of the textbox
                $(this).find("input").val(value);
                break;
            case "Get":
                //If its get the return the value of the textbox
                return $(this).find("input").val();
                break
            case "Reset":
                //if its reset the get the default value from the data variable and
                //set it to the textbox
                $(this).find("input").val($(this).data("Default"));
                break;
        }
    }
}

$(document).ready(function () {
    //Initialize the textbox
    $("#container").CustomTextBox({ Text: "Default Text" });

    $("#btnSetValue").click(function () {
        //set the value of the text box
        $("#container").CustomTextBox('Set', "New Value");
    });

    $("#btnGetValue").click(function () {
        //get the value of the text box and alert it
        alert($("#container").CustomTextBox('Get'));
    });

    $("#btnResetValue").click(function () {
        //reset the value of the text box
        $("#container").CustomTextBox('Reset');
    });
});
Now lets see the html section
<div id="container">
</div>
<input type="button" id="btnSetValue" value="Set Value" />
<input type="button" id="btnGetValue" value="Get Value" />
<input type="button" id="btnResetValue" value="Reset Value" />
So thats how you create a simple Jquery plugin.
Happy Coding :)
-Guru-
Friday, April 11, 2014
SQL server Pagination
Hi Readers
This post is about getting sql server results in a paginated manner,
Lets see the requirement
Simply when some one is requesting for a list of data you dont want to retrieve all records from the database and show it to the end user, this will affect the performance of the application and the user will be getting thousands on rows in a single request, think of the network traffic that can make.
So the solution will be getting only a subset of data, that is by pages. Show 1st 10 records of data then show the next 10.
This is easy to do when it you need to show the data that is already ordered by the primary key. you can use it to get the set of records easily, but what if its a dataset that you are showing for a search result, then the order will not be there.
Let see a way to achieve this.
The datasource used for this example is from the Adventure works database.
We are using the product table in production schema.
Lets take the first 10 rows
ProductID Name
1 Adjustable Race
2 Bearing Ball
3 BB Ball Bearing
4 Headset Ball Bearings
316 Blade
317 LL Crankarm
318 ML Crankarm
319 HL Crankarm
320 Chainring Bolts
321 Chainring Nut
There are two ways to achieve this
1st way is to use the offset keyword (Available from SQL server 2012)
2nd way is to use the row number and get results
Method 1
Offset - Fetch Method Introduced with SQL Server 2012
This method used the new clause that is offset and fetch
Here we'll have to first use the order by to order the results and fetch the records we need.
This code skips the first 'N' number of rows and returns the next 'M' number of rows.You can use this for pagination by setting the N to the count that you have already read and the items per page as M.
Method 2
Ranking the results
This method simply ranks the results and you can use the rank to get the result set you want using a where clause.
These are simple techniques that i used in one of my projects.
Happy Coding :)
-Guruparan-
This post is about getting sql server results in a paginated manner,
Lets see the requirement
Simply when some one is requesting for a list of data you dont want to retrieve all records from the database and show it to the end user, this will affect the performance of the application and the user will be getting thousands on rows in a single request, think of the network traffic that can make.
So the solution will be getting only a subset of data, that is by pages. Show 1st 10 records of data then show the next 10.
This is easy to do when it you need to show the data that is already ordered by the primary key. you can use it to get the set of records easily, but what if its a dataset that you are showing for a search result, then the order will not be there.
Let see a way to achieve this.
The datasource used for this example is from the Adventure works database.
We are using the product table in production schema.
Lets take the first 10 rows
ProductID Name
1 Adjustable Race
2 Bearing Ball
3 BB Ball Bearing
4 Headset Ball Bearings
316 Blade
317 LL Crankarm
318 ML Crankarm
319 HL Crankarm
320 Chainring Bolts
321 Chainring Nut
There are two ways to achieve this
1st way is to use the offset keyword (Available from SQL server 2012)
2nd way is to use the row number and get results
Method 1
Offset - Fetch Method Introduced with SQL Server 2012
This method used the new clause that is offset and fetch
Here we'll have to first use the order by to order the results and fetch the records we need.
SELECT  [ProductID]
      ,[Name]
FROM [AdventureWorks2012].[Production].[Product]
ORDER BY Name
OFFSET N ROWS
FETCH NEXT M ROWS ONLY
This code skips the first 'N' number of rows and returns the next 'M' number of rows.You can use this for pagination by setting the N to the count that you have already read and the items per page as M.
Method 2
Ranking the results
This method simply ranks the results and you can use the rank to get the result set you want using a where clause.
SELECT T.*
FROM
(
    SELECT *,ROW_NUMBER() OVER (ORDER BY NAME DESC) AS [rank]
    FROM [AdventureWorks2012].[Production].[Product]
) AS T
WHERE T.[rank]>((@PageNo*@Count)-@Count) and T.[rank]<(@PageNo*@Count)+1
Here the @PageNo is the number of the page you need details for and the @Count is the number of items per page.These are simple techniques that i used in one of my projects.
Happy Coding :)
-Guruparan-
Saturday, July 20, 2013
Installing Sharepoint 2013
This post will be a guide on installing sharepoint 2013.
This will be a process which has several steps.
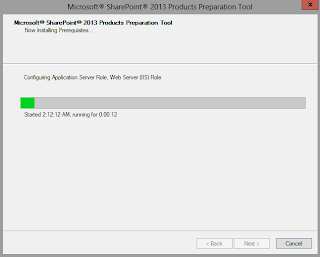
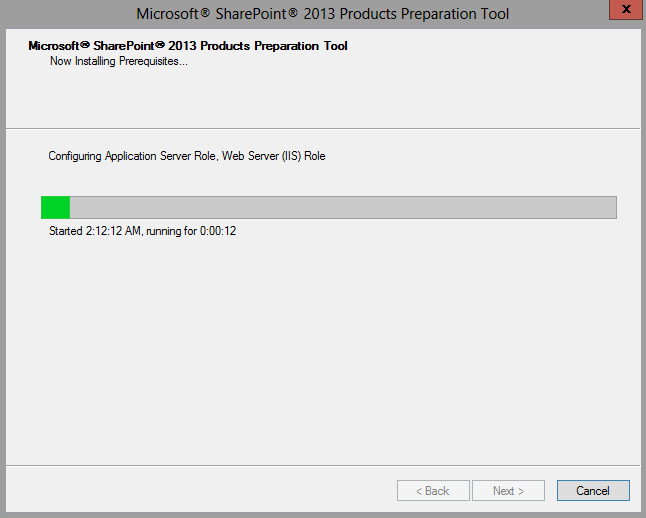
First we'll have to run the Sharepoint Prerequisite installer which will check for some software in your server and install them if they are not available enable the required roles in the server.
Step 1 - Prerequisite installer
The Prerequisite installer is very simple and you just have to click the next buttons to continue with the setup.
As this enables some some server roles this will require you to restart the server.



Step 2 - The Sharepoint setup
first open the setup.exe
It'll require you the key , you can provide the key that you purchased from Microsoft.
 Then the license agreement, well accept that and click continue.
 Then you'll have to select the installation type, here I'm installing for a farm so its a full installation, you can do a stand alone installation for development environments.
this step will require you to select the file locations as well.


Then it will install Sharepoint 2013 in your server.
 when the installation is done you can start the configuration wizard.

Step 3 - Sharepoint Product configuration wizard
This will help you to do the required configuration for Sharepoint.

when you click it'll ask whether to start some required services, click yes to continue.

In the next step you can choose to connect to an existing sharepoint farm or to create a new farm.
in this post we are going to create a new farm.

Then you'll have to select the database server for farm, it can even be the same machine if you are setting up a single machine.
 then you'll have to give the farm password.
 The next step will be selecting the port for Central Administration and the security type
 The next page will be a summary of the information you have just provided,
you can click next if everything is ok.
 Now the configuration wizard will run and do the required configuration.
 After the wizard complete it'll show a summary again saying that the configuration is successful.

Now that the installation and configuration is done, you can open the Central Administration using Internet Explorer.
Step 4 - Central Administration
The first window will ask you whether you want to be enrolled in the customer experience improvement program, select your preference.
 Then the CA will show you a page to do the required configuration. you can choose to do it later.
this is basically starting the services.
 if you choose to start the wizard you'll be shown a list of service applications that are to be started.
you can choose the ones you want to run in your farm. you can provide an account for the service applications.
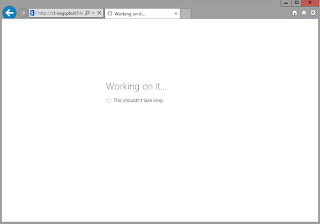
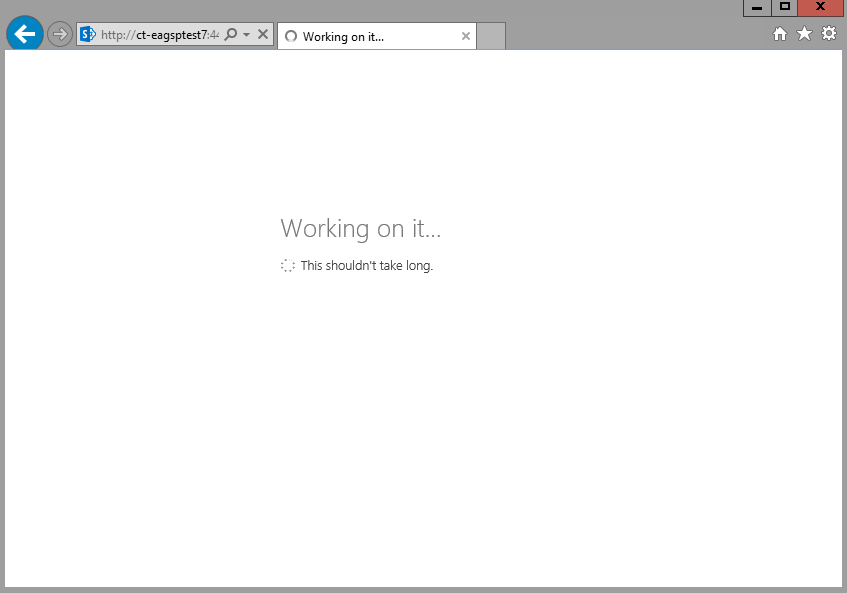
 When you click next, it will show the Working on it window, after that you can create web applications.
Thats it your Sharepoint 2013 farm is ready :)
This will be a process which has several steps.
First we'll have to run the Sharepoint Prerequisite installer which will check for some software in your server and install them if they are not available enable the required roles in the server.
Step 1 - Prerequisite installer
The Prerequisite installer is very simple and you just have to click the next buttons to continue with the setup.
As this enables some some server roles this will require you to restart the server.



Step 2 - The Sharepoint setup
first open the setup.exe
It'll require you the key , you can provide the key that you purchased from Microsoft.


this step will require you to select the file locations as well.


Then it will install Sharepoint 2013 in your server.


Step 3 - Sharepoint Product configuration wizard
This will help you to do the required configuration for Sharepoint.

when you click it'll ask whether to start some required services, click yes to continue.

In the next step you can choose to connect to an existing sharepoint farm or to create a new farm.
in this post we are going to create a new farm.

Then you'll have to select the database server for farm, it can even be the same machine if you are setting up a single machine.


you can click next if everything is ok.


Now that the installation and configuration is done, you can open the Central Administration using Internet Explorer.
Step 4 - Central Administration
The first window will ask you whether you want to be enrolled in the customer experience improvement program, select your preference.

this is basically starting the services.

you can choose the ones you want to run in your farm. you can provide an account for the service applications.

Thats it your Sharepoint 2013 farm is ready :)
Subscribe to:
Posts (Atom)